How To Install A Leveling Kit In An Easy Step-by-step Way?
Leveling kits are significantly more affordable and simpler to install than their suspension lift kit counterparts. Depending on the kit you purchase, you will only need to replace a small number of components, and your vehicle’s factory-specified payload capacity won’t be impacted. Even though it’s fairly easy, it’s still a highly mechanical process, so we advise reading all of your instructions before you begin and making sure you have all the required tools.
So, how to install a leveling kit?
To install a leveling kit: Before you begin disassembling your truck or SUV, make sure you are confident in your ability to work on your vehicle because it requires removing and reinstalling some crucial components. Your vehicle may sustain damage if a leveling kit is installed incorrectly.
If you do choose to do this yourself, you may want to think about having your car’s front-end alignment checked afterward. Your front tires’ even wear can be helped by doing this.
For more information, keep reading.
Table of Contents
What Is A Leveling Kit?
Compared to suspension lift kits, a leveling kit is a less expensive way to increase the height of your car. Making the front and rear of your car equal is the goal of a leveling kit. Vehicles of all kinds, including trucks, SUVs, and Jeeps, can have these kits installed. Many of these models have rear suspension systems that are higher than the front ones. This is done on purpose to prevent the car from squatting when it is hitched to a trailer. A leveling kit lowers the height difference between the front and rear of the vehicle by adding a small amount of lift to the front. A leveling kit typically allows you to raise the front of your car by up to 2 inches.
What Justifies Installing A Leveling Kit?
If you don’t tow with your truck or SUV, adding a leveling kit is primarily for aesthetic reasons so that the front and rear of the vehicle have comparable ride heights. But a leveling kit also has some useful applications in addition to this. if you want to upgrade your vehicle with bigger tires, a leveling kit can help you avoid those tires rubbing up against the inner fender. Additionally, you can increase your car’s front-end ground clearance by installing a leveling kit. This is excellent for drivers who require the clearance to maneuver over rocky terrain or those who intend to attach something heavy to the front of their car, like a snowplow.
While a leveling kit is significantly less expensive than a lift kit, it can’t raise your truck as much. A leveling kit costs anywhere from $100 to several hundred dollars. Lift kits easily cost you several thousand dollars and quickly surpass the $1,000 threshold.
The Cons Of Installing A Leveling Kit
Although installing a leveling kit in your car is relatively easy and secure, there are some disadvantages. Those include:
- Decreased fuel efficiency due to worsened aerodynamics
- Increased chance of uncontrolled steering oscillation commonly known as the “death wobble”
- Potential voiding of your vehicle’s warranty
- Possible increase of wear and tear on your suspension system
You might want to give installing a leveling kit another thought if you want to drastically alter the appearance of your truck. Leveling kits only raise the front of your car by about 2 inches, which may not be enough lift for drivers who prefer more lift over the leveling kit’s more useful applications. See more about Can You Stack Leveling Kits?
Keep In Mind
For various vehicle styles, there are various types of leveling kits. We advise you not to buy any leveling kits that make the claim that they can be installed in any vehicle. The main types of leveling kits are:
- Strut extension leveling kits
- Torsion key leveling kits
- Coil spring spacer leveling kits
Different techniques must be used to install each of these kits. Regardless of the kit you buy, make sure to follow the directions. Prior to beginning the installation process, make sure the kit you’re thinking about is appropriate for your truck or SUV.
There are various materials available for leveling kit spacers. Cheaper than others are some. Contrary to their steel counterparts, polyurethane spacers are more effective at absorbing tension and are resistant to chemicals found in road and vehicle fluids.
A further piece of advice is to read the instructions that came with your kit before getting started. This can help you avoid any unpleasant surprises when you realize you don’t have what you need for the kit halfway through the installation.
The alignment of your car might change if you install a leveling kit. To have it realigned again after that, think about taking it to the shop.

By Yourself: Install A Leveling Kit
In this article, we’ll walk you through each step of installing a leveling kit on your truck or SUV.
Before you begin, you will need to gather the following tools and materials:
- Leveling kit
- Jack and jack stands
- Wrench set
- Drill
- Drill bits
- Socket set
- Torque wrench
- Safety glasses
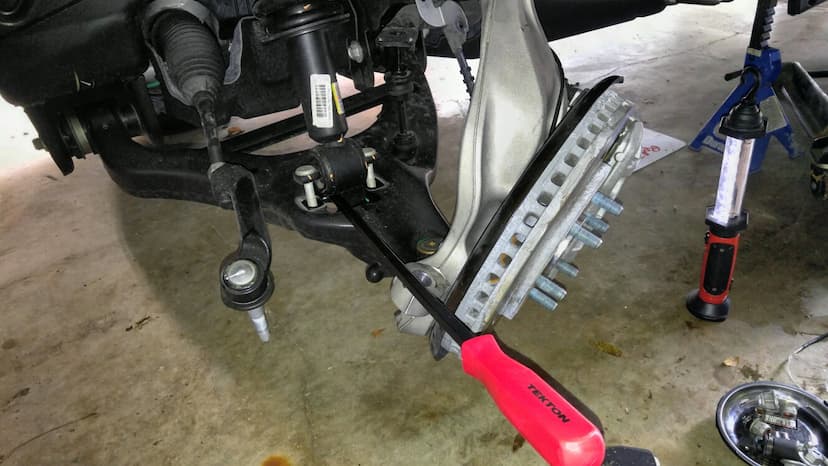
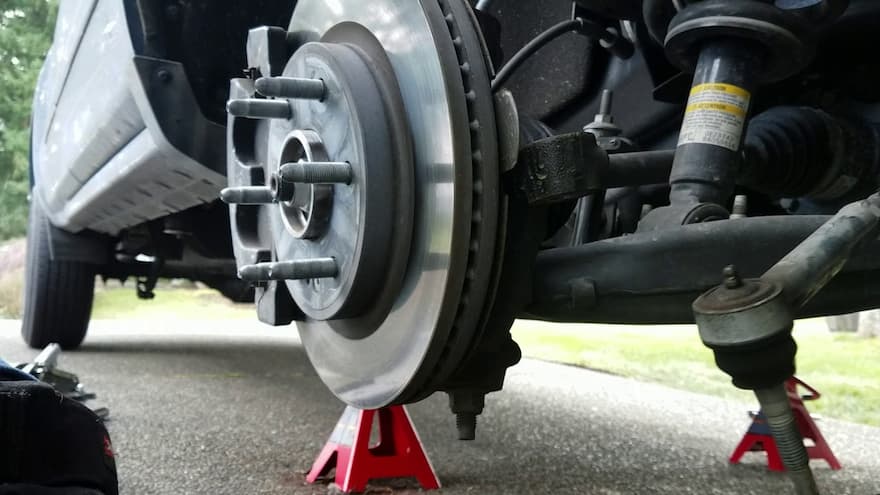
1. Put the emergency brake on as you park your car on a flat surface. Underneath the frame of your car, place jack stands on either side. Put your car on the jack stands while being very careful.
2. You should take your car’s wheels off.
3. Remove the bolts holding the coil spring to the lower control arm using a wrench. Each side could have two bolts.
4. The coil spring will be loose after the bolts are removed. The lower control arm’s coil spring should be carefully removed.
5. Compared to the previous coil spring, the new one is better. If their sizes differ, the leveling kit will come with instructions on which coil spring to use on which side.
6. In exactly the same place as the old coil spring, install the new one. Verify that the coils are pointing in the appropriate direction.
7. The bolts holding the coil spring to the lower control arm must be tightened using a torque wrench. According to the manufacturer’s instructions, the bolts should be tightened.
8. On the other side of the car, repeat steps 3 through 7.
9. Lower your car off the jack stands once you’ve finished both sides.
10. Attach the wheels to your car.
11. Tighten the lug nuts to the manufacturer’s specifications using a torque wrench.
12. To ensure proper operation, put your car through a road test.
An easy task that can be completed in a few hours is installing a leveling kit on your truck or SUV. You can quickly get your truck or SUV to look level by following the instructions in this article.
By Professionals: Install A Leveling Kit
There are a few different approaches you can take to leveling your vehicle. Either you or a professional can complete the task. There are a few things you need to be aware of if you decide to handle it yourself. The kind of leveling kit you require must be determined first. For various vehicles, various kits are available. Second, you must be familiar with kit installation. Third, you must understand where to obtain the kit.
There are a few things you should be aware of if you choose to have a professional work on your car. You must first locate a reputable store with a leveling kit focus. Second, make sure the shop has experience working on the kind of car you have. Third, make sure the store uses high-quality components.
You have a few options when it comes to picking a store. You can either visit a nearby store or an online store. Make sure the store is reputable if you decide to visit a nearby one. Check with your friends and family to see if anyone has had a positive experience with the store. You can read reviews online as well.
Make sure the online store is reputable before you decide to shop there. To find out if anyone has had a positive experience with the store, read reviews online. You can also see if the store belongs to the Better Business Bureau.
Once you’ve located a reputable shop, you need to confirm that they stock the appropriate parts for your car. They must be trained on how to install the kit, as well, you must ensure. Before you bring your car in, you can request a quote. This will allow you to shop around and compare prices to ensure you are getting a good deal.
Your car will be inspected when you bring it to the shop to determine what kind of leveling kit you need. A price estimate will then be given to you. They will install the kit once you accept the price.
Installing a leveling kit is a simple procedure. However, it’s crucial that you adhere to the instructions given to you. You risk damaging your car by disobeying the instructions.
It’s crucial to keep in mind that leveling your car is not something you ought to do frequently. It should only be done if you believe your car is not level. You run the risk of damaging your suspension if you do it too frequently.
Leveling Kit Installation Cost
A leveling kit’s price will differ based on the vehicle’s make, model, and type of kit being installed. Most leveling kits will cost between $100 and $200, though some may cost as much as $500. Depending on the shop and the technician, the labor cost to install a leveling kit can range from $50 to $100.
Conclusion
To level out a vehicle, an aftermarket suspension modification called a leveling kit is installed. The most typical justification for installing a leveling kit is to achieve a more level appearance, as many factory-installed suspension systems have a tendency to leave the vehicle’s rear end slightly higher than the front.
This may be the result of a number of factors, such as the engine’s heavier weight than the rear axle or to account for the addition of a bulky aftermarket bumper or winch. Installing a leveling kit can also help a vehicle perform better off-road or make it possible to mount bigger tires.
Please leave a comment if you have any queries.

