How To Run First Aid From Recovery? See Answer
To start with, how to run first aid from recovery?
To run first aid from recovery: back up your mac data, boot your mac into recovery mode, and repair your mac disk using first aid.
First Aid can be launched from a startup drive, but it cannot repair until certain actions are taken. An infected startup drive on a Mac could cause operations to overwrite the original data. Data loss consequently happens. You must make a backup of your data before launching First Aid to avoid data loss. Data recovery can help you backup your data if you don’t already.
For more specific information, keep reading.
Table of Contents
What Situations Require Running First Aid From Recovery?
In general, there are 3 situations:
Your Mac Won’t Turn On All The Way
Your Mac computer will not successfully boot up if macOS crashes or the startup disk is corrupted or damaged. Run First Aid from Recovery if you need to fix your Mac disk using it.
You Want To Fix The Startup Disk On Mac
Your Mac must first boot into Recovery Mode before you can access Disk Utility or use First Aid to check and repair the drive if you want to repair your startup disk.
First Aid Found Corruption On The Disk
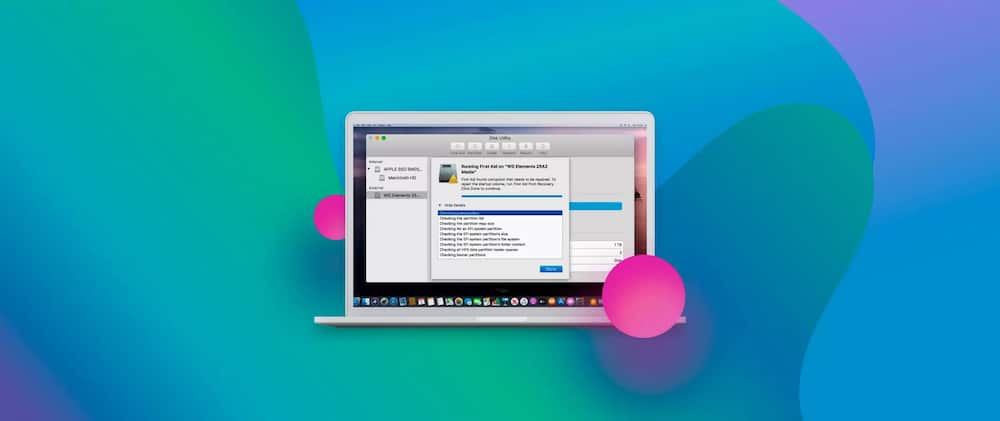
First Aid can identify and fix issues with a disk’s formatting and directory structure on your Mac. However, if the tool finds corruption on your disk, it will prompt you: First Aid found corruption that needs to be repaired. Run First Aid from Recovery in order to restore the startup volume.
To view more relevant details, click Show Details. For example, you can see the error code like
It is necessary to repair the corrupted volume on the Macintosh HD.
A partition map issue was discovered that might make booting impossible.
Any type of error you see only requires you to launch First Aid from Recovery and then use this tool to repair the disk.
Run First Aid From Recovery
First Aid cannot be started from Recovery in a single action. The whole process includes the following steps:
- Step 1: Back up your Mac data
- Step 2: Boot your Mac into Recovery Mode
- Step 3: How to run First Aid from Recovery
- Step 4: Repair your Mac disk using First Aid
In the sections that follow, we will now introduce these steps.
Back Up Your Mac Data
Make sure you have a recent backup of your Mac data in order to protect it. In that case, you ought to make a local backup of your Mac.
Advice: You can skip directly to Step 2 if you don’t need to back up your Mac.
Backup Method 1: Use Time Machine
Your Mac can be backed up using Time Machine if it boots up normally. However, this approach is not available if your Mac won’t boot up completely. Third-party software must be used.
Backup Method 2: Use Stellar Data Recovery for Mac
A Mac data recovery program is a good option to recover data from an unbootable Mac computer. Stellar Data Recovery for Mac is an option. Mac data recovery software of the highest caliber. It is compatible with macOS Big Sur, Catalina, Mojave, and other versions.
In order to recover data from a Mac that won’t boot normally, you must use this software’s Professional or higher edition to create a recovery drive and then boot your Mac from that drive. You can visit the MiniTool website to purchase the Professional or a more sophisticated edition, depending on your needs. Furthermore, since your Mac won’t boot, you must create this recovery drive using a normal functioning Mac and a USB drive.
All files on the USB drive will be deleted during the creation of the recovery drive. If the USB drive contains important files, you should make a backup of them.
You might not know how to make a recovery drive and use it to recover your Mac’s data if you’re a beginner. Here, we will show you a full guide:
Stage 1: Create a Recovery Drive
- Connect a Mac that is operating normally to a USB drive.
- On that Mac, download and install Stellar Data Recovery for Mac.
- Enter the software’s main interface by registering it with the license key you were given.
- To proceed, select the Click here link in the bottom left corner of the software.
- On the next, tiny interface, you must choose the USB drive that is currently connected. Next, proceed by clicking the Create Recovery Drive button.
- Another interface appears, warning you of the repercussions. If everything is ready, press OK.
- You’ll see a prompt after the process is finished. To close the prompt, click OK.
- Remove the USB drive’s plug from the Mac.
Stage 2: Rescue Your Mac Data
- To save your Mac data at this stage, you must prepare and attach an external storage drive to your computer. To store the data you want to restore, the external drive needs to have enough space.
- Your unbootable MacBook should have both the external storage drive and the USB recovery drive connected.
- Press and hold the Power button until the startup options window appears on a Mac computer built with Apple silicon.
When using a Mac with an Intel processor, you must first turn on your Mac by pressing the Power button, and then you must immediately press and hold Command+R until you see the Apple logo. The window for startup options is then also visible.
- To continue, pick RecoveryDrive.
- (This is Mac Recovery Mode) The macOS Utilities interface appears. Click Continue after selecting StellarDataRecovery.
- You access the primary user interface of the software. To proceed, you must select the data type that you want to restore and click the Next button. Simply turn on the Recover Everything button if you want to recover all types.
- The drives that this software can find on your Mac are displayed. Next, you must decide which drive you want to use for data recovery. Deep Scan is not chosen by default. The deep scan must be manually activated if you want to run one.
- To begin scanning the chosen drive, click the Scan button.
- For a few minutes, scanning will be taking place. You must wait patiently for the process to be completed. As soon as the scanning is finished, a window will appear to inform you. The window must be closed by clicking the OK button.
- The scan’s outcomes will be displayed. The files you want to restore must then be checked. If you’re unsure, you can double-click the file to see a preview and confirm.
- Click the Recover button to continue after selecting the files you require.
- The connected external storage drive must be chosen as the output drive by clicking the Browse button on the pup-up interface.
- To save your chosen files, click the Save button.
Now that your Mac files have been saved, they are secure.

Boot Your Mac Into Recovery Mode
First Aid: How do I run it from Recovery? Accessing Mac Recovery Mode is the first step. It was covered in the section above. Or you can refer to the following instructions:
Repair Your Mac Disk Using First Aid
- On the top toolbar, there is a First Aid button. Click it to proceed once you’ve chosen the target volume.
- A small interface pops up, saying Run First Aid on “the name of the disk“? To confirm the action, click the Run or Repair Disk buttons.
- The chosen disk will now be checked by this utility. You will see the prompt for success when the process is finished successfully. To end the prompt, select Done. See more about Why Is First Aid Important?
Repair A Mac Disk With Disk Utility
Use the First Aid feature of Disk Utility to find and repair disk errors
The directory structure and formatting errors on a Mac disk can be found and fixed using Disk Utility. When using your Mac, errors can cause unexpected behavior, and serious errors may prevent your Mac from even starting up at all.
Make sure your Mac is currently backed up before continuing in case you need to recover damaged files or Disk Utility discovers errors that it is unable to fix.
Open Disk Utility
The Utilities folder of your Applications folder is where you typically open Disk Utility. However, if your Mac doesn’t start up all the way, or you want to repair the disk your Mac starts up from, open Disk Utility from macOS Recovery:
- Determine whether you’re using a Mac with Apple silicon, then follow the appropriate steps:
- Apple silicon: After turning on your Mac, press and hold the power button until the startup options window appears. Continue by clicking the Options-labeled gear icon after doing so.
- Intel processor: After turning on your Mac, press and hold Command () and R simultaneously until you see the Apple logo or another image.
- It might be necessary for you to choose a user whose password you know. After choosing the user, click Next and type in their administrator password.
- Click Continue after selecting Disk Utility in the macOS Recovery’s utilities window.
Select Your Disk In Disk Utility
Select View > Show All Devices (if available) from the Disk Utility menu bar or toolbar.
Starting with your startup disk, the sidebar in Disk Utility should now display every disk or other storage device that is currently in use. Any containers and volumes on each disk should be visible beneath it. Don’t see your disk?
In this illustration, the startup disk (APPLE SSD) contains one container and two volumes (Macintosh HD and Macintosh HD – Data). Your disk might not have a container and it might have a different number of volumes.
Repair Volumes, Then Containers, Then Disks
Choose the last volume on each disk that needs repair before selecting the First Aid button or tab.
Here, Macintosh HD – Data is the final volume on the disk.
To start looking for errors on the chosen volume, click Run.
- The Repair Disk button should be selected if there is no Run button.
- Skip this step for the selected disk, container, or volume if the button is dim and you are unable to click it.
- Enter your administrator password if a password is required to unlock the disk.
Select the item directly above the volume that Disk Utility has finished examining, then launch First Aid once more. First Aid should be run for each volume, then each container, then the disk itself as you move up the list.
In this case, the components were repaired in the following order: Apple SSD, Macintosh HD-Data, Macintosh HD, Container disk4, and Macintosh HD.
Exit Disk Utility once you’re finished. You can restart your Mac if you used Disk Utility from macOS Recovery by selecting Apple menu > Restart.
If Disk Utility Found Errors That It Can’t Repair
Use Disk Utility to format your disk if it discovered errors that it was unable to fix.
If Your Disk Doesn’t Appear In Disk Utility
Disk Utility will not be able to see any containers or volumes on your disk if it cannot see your disk. In that case, follow these steps:
- Unplug all auxiliary devices from your Mac after it has been powered off.
- If you’re fixing an external drive, be sure to use a cable that you are confident is in working order to connect it directly to your Mac. Then switch the drive on and off.
- If Disk Utility still doesn’t show your disk, your Mac might require repair. Contact Apple Support if you require assistance.
Conclusion
We trust that this article has shown you how to use First Aid from Recovery to fix a corrupt disk on a Mac. Furthermore, we wish Stellar Data Recovery for Mac could assist you in regaining the Mac data that you require.
I appreciate you reading.

